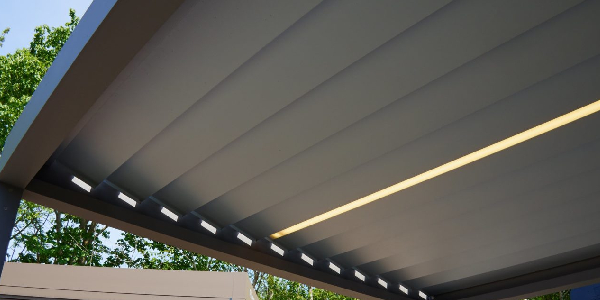
UP TO THE MINUTE
Boost your business with patio cover installs

By RPS Metal Roofing and Siding.
Learn how to build the perfect metal roof patio cover.
As fall and winter set in, it’s a great time to offer clients a patio upgrade with a durable metal roof cover that provides shelter from the elements. By building a comfortable, year-round accessible space, you can help your customers have more space for entertaining and enjoying time with loved ones. Check out this guide from RPS Metal Roofing and Siding for setting up a metal roof cover on a variety of patio-types to help your customers get the most out of the summer.
Choose the right material
The very first thing to consider is the materials that you use in a patio renovation project. The materials are important here because you’re looking at building a metal roof patio cover. You want something that can withstand the weather, but you also want to ensure that you don’t have to spend too much money.
Corrugated metal roofing works here because it’s resistant to high winds and heavy rain, it’s lightweight which means it’s not going to weigh down the side of the home and it structurally sound – it’s rarely going to warp. If you use corrugated metal, you can also change how you sit the patio cover at the side of the home. The patio cover could then start at the edge of the house’s roof and slope right down which leaves you with clearance on the lowest part of the frame.
When it comes to buying materials, be flexible about it. Make sure you understand all of the local code so that you can ensure that the new patio roof is going to be acceptable for the local area. You also want to shop around so that you can make sure that you get the best possible price on the metal as well as all of the fixings involved. You don’t need to buy too much, so make sure that you go to the store that will give you the correct materials for the job and look over the plan with you. This way, you aren't buying things that you don’t need.
Get your permits in a row
Some people may tell you that it’s not necessary to get a building permit just for a patio cover, but you need to call the permit and licensing office to get the correct answers. Some home improvements can raise property taxes and other home improvements require a permit. Building a metal roof patio cover is one such improvement that does require a permit. It won’t raise property taxes necessarily, but if you’re going to make alterations to the house, a building permit will be needed. Make sure that you call ahead first because your local government may see different!
Get the building started
Once all your materials arrive, it’s time to get to work. Organization is key to success in this stage. Think about the type of layout that you’re going to use to make it easy for you to reach the materials that you need. Consider building this just the way that you would build flat-back furniture, make sure you have all your fixings and fixtures laid out and ready to go.
Install a ledger board
The first part of the project is installing the ledger board. This will make sure that you have a solid frame for your metal roof patio cover. You don’t want anything wiggling or dangling after the installation. Once again, you want to make sure that everything is legal. This means that the ledger board you choose should be of the right size as dictated by local laws.
After you’ve done that, you can pre-drill holes in the ledger board, so you have a good idea where everything will need to be slotted in. Use decking screws to keep the ledger board in place. Many people use staple guns to help keep the cable lines in place, as well.
The post holes
It can be difficult to figure out where to dig these, as most people would like them to be exactly a certain length from the roof edge. Consider where your home’s foundation is first and the roof’s drip edge next. You need to make sure that you use accurate measurements and here is where you should think about using a contractor to do this for you. You can use a simple shovel to dig the holes and you can use a garden hoe to stamp down and compact the dirt at the bottom of the holes.
Assembling the frame
Now that all the post holes are drilled, it’s time to assemble the frame. Make sure you lay it out on solid smooth ground. You need to cut the braces at 45° angles and then grab a ruler and measure the width of your board. Mark the legs at the end of the board. You can then cut from that side to the corner and create a triangle of wood, that’s sure to be the right shape.
Now it’s time for you to assemble the pieces. Lay them out on the ground and carefully measure which position each piece will go into. Once you have done all of this, it’s time for you to prepare what is known as the joist.
Raise up the frame
After all of that is done you’ve now reached the fun part! This is where you’re going to raise up the frame. It’s always best to get help to raise this up but if you can’t find anybody, grab some prop sticks as it should help. A single framing nail will be necessary to attach a 10-foot-long board.
The other end will hold up the frame as you begin to lift. You will keep the other end of the frame on the ground to prevent everything from falling back down again. In the middle, you can then attach the right board to your center post and go ahead and lift from the very end.
When you begin to lift a frame make sure you move towards it. You should have your frame standing upright in your post hole without any strain at all. You can then attach the joist to both sides and secure your corners with chopsticks as well as the center lifting board.
Pouring concrete
Make sure that the frame is leveled right across the top, so that you can lift the post just a tiny bit and add some dry concrete ready mix. The height will be raised up enough to meet the level in your bubblehead to give a perfect reading.
Once your posts are straight you can go ahead and lift the bottom of them into the post holes. Be sure to measure with your level every adjustment that you make. You can then pour in the concrete mix.
Finishing up
Once your frame is up you will now need to attach it to the boards. These boards will be attached to the top of the joints and you will then be able to screw the metal roof to these bolts. Finally, make sure that the upper end of the metal sheets you have, go under the drip edge as well as the roof decking of the house.
Now your customers have an amazing patio cover that they can enjoy with your family and friends while making amazing memories.
Original article source: RPS Metal Roofing and Siding
Learn more about RPS Metal Roofing & Siding in their Coffee Shop Directory or visit www.rpsmetalroofing.com.


Comments
Leave a Reply
Have an account? Login to leave a comment!
Sign In